|
|
ENVIS Technical Report 77, Febraury 2014 |
ENVIRONMENT MONITORING IN THE NEIGHBOURHOOD
|
QUANTUM GIS (QGIS) – SPATIAL MAPPING TOOL
|
QGIS is a Free and Open Source GIS for manipulating geographical data (vector, raster), statistical analysis.
INSTALLATION:
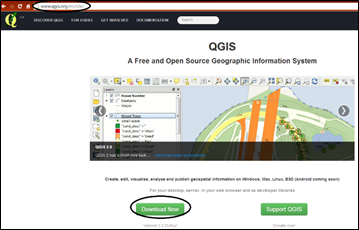
- Click on download now you will find the list of versions available.
- Download the latest stable version.
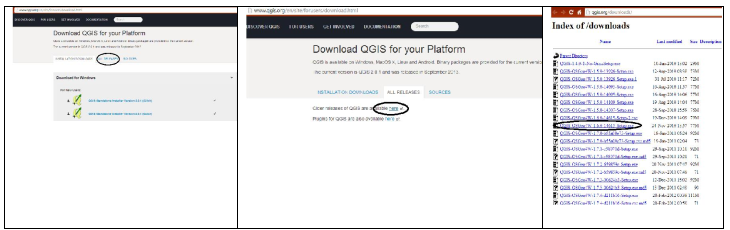
- Installation of Software: Double click on QGIS-OSGeo4W-1.6.0-3-Setup-x86_32.exe. After the installation click on QGIS icon on the desktop.
Use of QGIS:
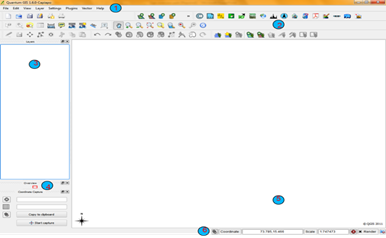
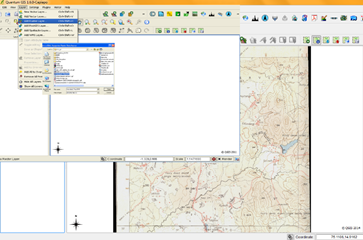
- QGIS main window will be opened and looks as shown
- The menu bar provides access to numerous QGIS features.
- The toolbars offers additional tools for interacting with the map. Hold the mouse over the particular icon, a short description of the tool’s purpose will be displayed.
- The map legend area sets the visibility
- QGIS - maps are displayed in map canvas area
- The map overview panel provides a full extent view of layers added
- The status bar shows the current position in map coordinates
Geo referencing:
- Geo-referencing is the process of assigning real earth coordinates to the digitised maps, so it can be viewed, queried, and analysed with other geographic data.
- To start geo referencing an unreferenced raster, we must load it by clicking Plugins menu option in the menu bar and click on Georeferencer plugin. The Georeferencer window will be opened click on File menu and click Add raster layer. The raster will show up in the main working area of the dialog. Once the raster layer is loaded, we can start to enter reference points.
- Using the Add Point button (Edità Add points), you can add points to the main working area and enter their coordinates. Click on a point in the raster image which you want to assign co-ordinates and enter the X and Y coordinates manually. With the move button option you can move the GCPs (Ground control points) on map, if they are at the wrong place.
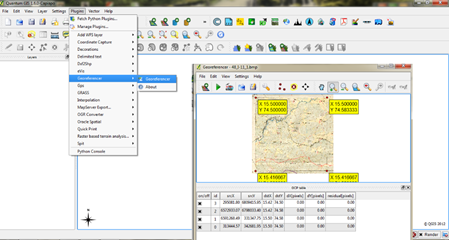
- Continue entering points. You should have at least 4 points and the more coordinates you can provide, the better the result will be. There are additional tools on the plugin dialog to zoom and pan the working area in order to locate a relevant set of GCP points.
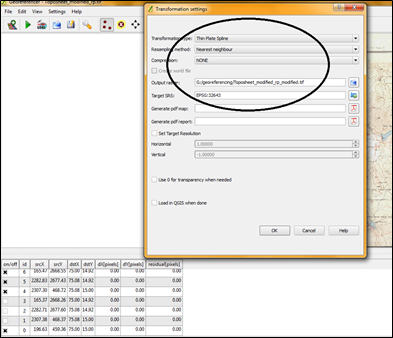
- After entering GCP’s click on Settings option in Georeferencing menu bar select Transformation Settings option. A drop box will be displayed and select options as shown in the below image. Specify output file name and transformation parameters and projection system then click OK.
- Click on File menu and Select Start Georeferncing option. The Georefrencing will be started.
Digitising vector data
Digitising features (water bodies) of Topo map:
- Open the raster file you have geo referenced by clicking Layerà Add raster layer option.
The raster layer window will be open and load the saved layer. It will be displayed on Map canvas.
- To digitise the water bodies select Layer menu and click Newàcreate new shape file layer option. Then new shape file layer drop box will open with options.
- Select polygon option and provide the attributes for it and save the file with a name. The saved new shape file will be loaded for creation of features.
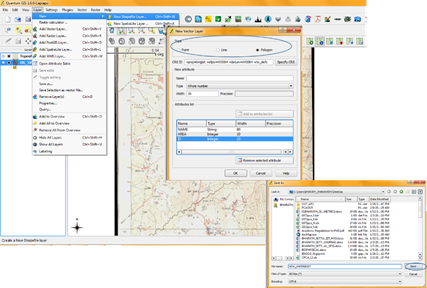
- Attributes are entered as features to be created.
Zoom to the feature you want to digitize by using zoom options. Right click on the vector layer you have created and select Toggle editing (pencil like symbol) option. Then tool bar will be highlighted. Click on capture polygon icon and start digitizing the water body
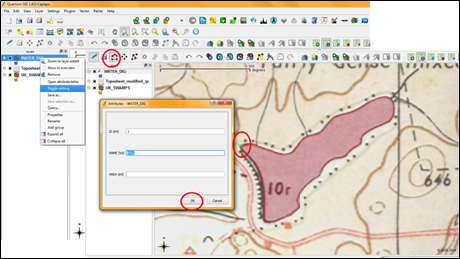
- Enter the attributes and press ok. After digitisation click save layer option to save the modifications you made.
- To compute area of the polygon right click on the layer you digitised and click open attribute table and select field calculator select area option to compute area.
- The area will be shown in degrees. Convert it to Hectares by adding new column and provide the name for new column. Then select field calculator select the new column to be updated.
- Type the formula as AREA*110*110*100 for getting in terms of Ha.
Importing Google earth data:
- To load a vector file click on Layer menu in menu bar select add vector layer, a dialogue box will be displayed, which allows to traverse through the file system and load a kml file which you have created using Google earth or other formats of vector data.
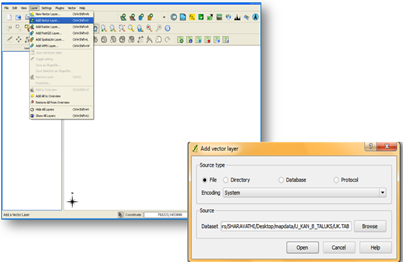
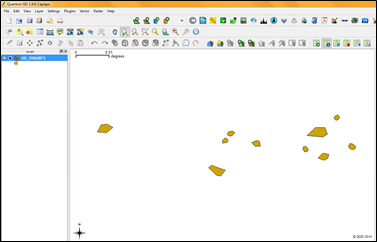
- The layer will be displayed in the map canvas area.
- Right click on the layer and select properties to check the attributes, colors etc.
- QGIS supports a number of Symbology renderers to control how vector features are displayed
- Labels tab allows to enable labelling features and control a number of options related to fonts, placement, style, alignment and buffering.
- Attributes tab allows to manipulate the attributes of the selected dataset
- General tab permits to change the display name, view/change the projection of vector
- Metadata tab contains general information about the layer which is not yet editable.
- Diagram tab used to overlay a graphics to a vector layer. It allows overlying pie charts, bar charts.
- Right click on the layer click save as option to create a shape file. Import the shape file and continue to work with it. So you can edit the features and compute the area etc.
Help from QGIS:
http://www.qgis.org/en/site/forusers/index.html#
http://www.qgis.org/en/docs/index.html
|
Dr. T.V. Ramachandra
Centre for Sustainable Technologies,
Centre for infrastructure, Sustainable Transportation and Urban Planning (CiSTUP),
Energy & Wetlands Research Group, Centre for Ecological Sciences, Indian Institute of Science, Bangalore – 560 012, INDIA.
E-mail : cestvr@ces.iisc.ac.in
Tel: 91-080-22933099/23600985,
Fax: 91-080-23601428/23600085
Web: http://ces.iisc.ac.in/energy
Asulabha K S Energy & Wetlands Research Group, Centre for Ecological Sciences, Indian Institute of Science, Bangalore – 560 012, INDIA.
E-mail:
asulabha@ces.iisc.ac.in
Bharath H. AithalEnergy & Wetlands Research Group, Centre for Ecological Sciences, Indian Institute of Science, Bangalore – 560 012, INDIA.
E-mail:
bharath@ces.iisc.ac.in
Bharath SetturEnergy & Wetlands Research Group, Centre for Ecological Sciences, Indian Institute of Science, Bangalore – 560 012, INDIA.
E-mail:
settur@ces.iisc.ac.in
Durga Madhab MahapatraEnergy & Wetlands Research Group, Centre for Ecological Sciences, Indian Institute of Science, Bangalore – 560 012, INDIA.
E-mail:
durgamadhab@ces.iisc.ac.in
Gouri KulkarniEnergy & Wetlands Research Group, Centre for Ecological Sciences, Indian Institute of Science, Bangalore – 560 012, INDIA.
E-mail:
gouri@ces.iisc.ac.in
Harish R. BhatEnergy & Wetlands Research Group, Centre for Ecological Sciences, Indian Institute of Science, Bangalore – 560 012, INDIA.
E-mail:
harishrbhat@gmail.com
Sincy VargheseEnergy & Wetlands Research Group, Centre for Ecological Sciences, Indian Institute of Science, Bangalore – 560 012, INDIA.
E-mail:
sincy@ces.iisc.ac.in
Sudarshan P. BhatEnergy & Wetlands Research Group, Centre for Ecological Sciences, Indian Institute of Science, Bangalore – 560 012, INDIA.
E-mail:
sudarshan@ces.iisc.ac.in
Vinay S.Energy & Wetlands Research Group, Centre for Ecological Sciences, Indian Institute of Science, Bangalore – 560 012, INDIA.
E-mail:
vinay@ces.iisc.ac.in
Citation:Ramachandra T V, Asulabha K S, Bharath H. Aithal, Bharath Settur, Durga Madhab Mahapatra, Gouri Kulkarni, Harish R. Bhat, Sincy Varghese, Sudarshan P. Bhat, Vinay S. 2014. Environment Monitoring in the Neighbourhood, ENVIS Technical Report 77, Environmental Information System, CES, Indian Institute of Science, Bangalore 560012
| Contact Address : |
| |
Dr. T.V. Ramachandra
Energy & Wetlands Research Group,
Centre for Ecological Sciences, TE 15, New Biology Building, Third Floor, E Wing, [Near D Gate], Indian Institute of Science, Bangalore – 560 012, INDIA.
Tel : 91-80-22933099 / 22933503-extn 107
Fax : 91-80-23601428 / 23600085 / 23600683 [CES-TVR]
E-mail : cestvr@ces.iisc.ac.in, energy@ces.iisc.ac.in,
Web : http://wgbis.ces.iisc.ac.in/energy |