


| Construction of Ferro-Cement Reservoirs |
| Construction of Ferro-Cement Reservoirs |
The ferro-cement technique here remains the same as described in sections Reservoir Without Mouldą and Reservoir with Factory-Made Mouldą. The difference in this technique lies in the method of shuttering applied. In principle it is a made-on-site mould. By means of shuttering, therefore, it can be used in cases which are unsuitable for other techniques, see Chapter 2.2. In addition this technique uses fencing mesh which is also adequate for the technique explained in Reservoir with Factory-Made Mouldą.
Choose the tank size according to the advice given in Calculation of Rainwater Volume.
Choose the most suitable location of the tank according to the general advice given in Calculation of Rainwater Volume.
Prepare the ground and dig the foundation. The different techniques required for the different soil conditions are explained in sections Reservoir Without Mouldą and Reservoir with Factory-Made Mouldą.
Don't forget to place the water tap unit, see section Reservoir Without Mouldą and Fig. 5.8.

 1. Preparation of the mould or erecting the shutter
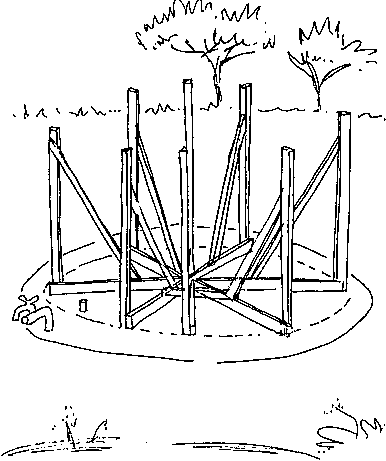
Keep the concrete covered with plastic for two days until the slab has set. This means keeping the slab wet. Mark the centre point of the tank and a circle corresponding to the inner diameter of the tank, see schedule Reservoir Without Mouldą.
This circle is needed for positioning the framework. Prepare the supporter for the shutter as shown in Fig. 5.38. Using a spirit level make sure the upright rafters have strong support and are fixed in a vertical position. The base timber cross on the slab should be fixed in the centre to avoid dislocation. This can be done either with steel nails hammered into predrilled holes, or by putting pieces of 10-mm or 20-mm reinforcement steel into the still fresh concrete after the slab is poured or during this process. It is imperative that the timber structure to support the shutter be immovable. After you have prepared the four major supporters at right angles to each other, the four vertical rafters must form a square on the slab. All sides should be the same length. Now form an octagon by preparing intermediate supporters. Ensure that the octagon is equilateral, meaning all sides on the ground have the same length. Start fixing the corrugated roof sheets. These sheets must overlap each other by at least one corrugation. They should be fixed using short nails at the top and the bottom. Fix the sheet about 20 mm above the concrete slab. Keep the last sheet unnailed and use this opening to go inside and check the supporting structure. If necessary fix additional spreading stabilization, see Fig. 5.39.
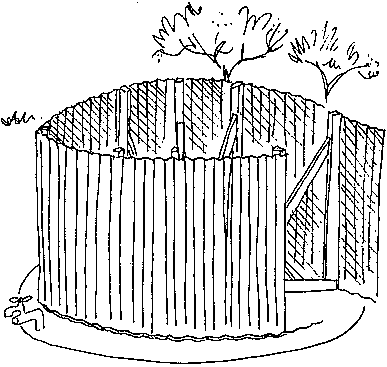
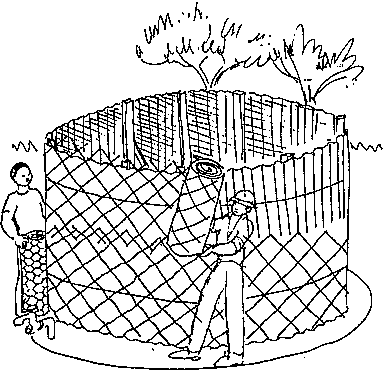
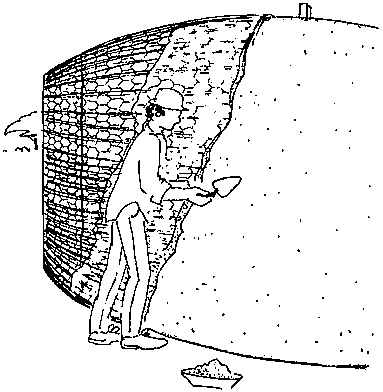
After the shutter is closed and the last roof sheet closely fixed, tie soft wire tightly around the galvanized sheets at least in the upper third and bottom third parts. Now the mould must be well stabilized and really fixed in position. If this is not the case, improve the support structure. Do not start wrapping the mould with mesh wire before stability is achieved. Once this is done pull out all nails or as many as you can still pull. Then roll wire mesh around the mould as shown in Fig. 5.40. The wire mesh must extend under the sheet at least 150 mm to the inside of the tank, as shown in Fig. 5.32. It also must extend about 200 mm over the top of the sheets. Overlapping must be 200 mm. It will be difficult to push the mesh wire underneath the mould, so the 20-mm space must be kept between the slab and the sheets. Where the mesh is hindered by the vertical supporting structure inside the mould, cut the wire vertically in such a way that both of the cut sides can pass the supporting timber. If the fencing mesh is not tight to the mould, which is likely, use soft wire again to tie it round tightly. The next step is to increase the reinforcement by a layer of chicken wire, overlapping by 200 mm, Fig. 5.41. The chicken wire should be tied loosely to the mesh wire.
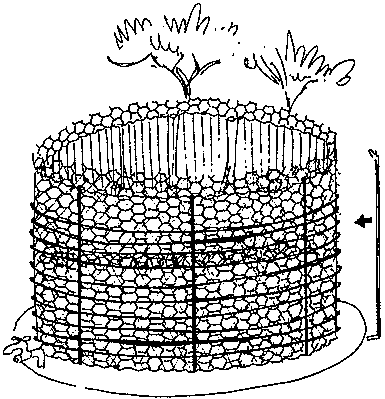
Prepare 10-mm mild steel reinforcement bars bending them at both ends after cutting them to the right length, as shown in Fig. 5.41. The bent ends are to be added to the height of the mould. These bars are loosely fixed in position by using soft wire and binding them to the fencing mesh. The vertical bars should be equidistant from each other, between 1.00 and 1.5 m. After this is achieved, start wrapping 16-gauge fencing wire around the outside, starting at the bottom. This is the same procedure as shown in Fig. 5.14 and spacing should be accordingly. Wrap the wire three times around the bottom, then coil the wire upwards with a 10-mm spacing for the first 600 mm above ground. From there you can increase the distance to 20 mm until you reach the upper 300 mm, when you should again narrow the distance to 10 mm and apply it again three times at the top.
After the reinforcement is finished, prepare for plastering. For this work, see sections Material Testing and Mixing and Reservoir Without Mouldą. The first plastering coat is done one day, then the structure is covered with plastic foil. On the second day, the second coat is be plastered, Fig. 5.42. The second coat is float-finished using a wooden float. After the second coat is finished, the structure must be covered again with plastic sheeting to keep the plaster damp. Only after a period of about 12 hours (overnight) can the plastic be removed and the mould be dismantled. For this purpose a scaffold or two ladders joined together as shown in Fig. 5.16 must provide access to the inside without damaging the wall. Dismantling of the shutter must be carried out with great care, avoiding unnecessary hammering and anything which can affect the structure.
For inside plastering again see the advice given in sections Material Testing and Mixing and Reservoir Without Mouldą. The wire mesh which was pushed underneath the mould provides reinforcement for the corner between the wall and the floor, about 100150 mm up the wail and inside the floor. Use a glass bottle as described in Reservoir Without Mouldą section and as shown in Fig. 5.24. After this is done or before you execute the curved corner, apply the nil coat to the wall.
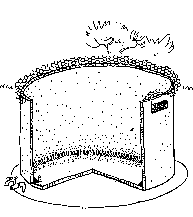
Floor finish is to be performed as explained in Reservoir Without Mouldą. The construction can be done before shuttering the roof or after the roof is finished and the shutter removed. The advantage of doing the job before shuttering is the easy access for the material that has to be brought into the tank. The disadvantage is that the floor finish cannot be protected against damage during the work process. To apply the floor finish after the roof shuttering is dismantled means transporting all mortar through the manhole. If this is considered a reasonable procedure, which depends on the situation and the resources on site, then do it. It is the better solution. Otherwise, careful repair of the floor finish must be performed and the nil coat on the floor should always be applied after the shuttering is removed, see Fig. 5.44.
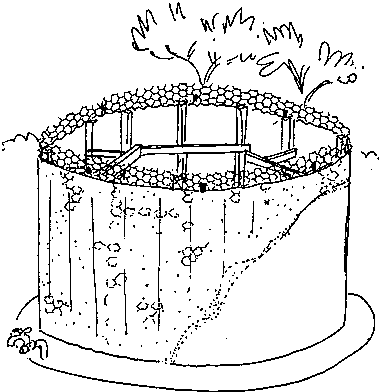
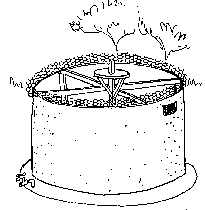
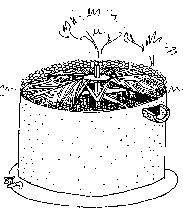
Figs. 5.45 and 5.46 show different stages of the roof shutter based on a central pole. The platform for the pole should be 250 mm higher than the tank wall. The central pole is fixed in position by a cross of timber boards supported at the wall. It might be necessary to fix a second cross as for moulding the shutter, in such a way that the ends of the timber boards (or rather rafters) form an octagon where they are supported at the wall. If this is achieved, segments of chipboard or blockboard should be cut as shown in Fig. 5.46. These trapezoidal pieces of timber are to be supported against the supporting understructure. A manhole of 450 x 450 mm must be made by nailing a frame of this size onto the shutter boards at the desired place. Reinforcement of the roof can be performed with the rest of the reinforcement rods and fencing wire. This should be done in such a way that the reinforcement rods fixed with binding wire to the vertical steel bars of the wall will meet in the centre of the roof, where they are to be tied together. This reinforcement should be covered and tied to the fencing mesh. The extended mesh from the wall must be tied to the roof mesh.
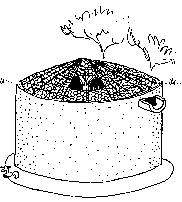
After roof shuttering has been finished, the entire opening of the tank covered and gaps filled with paper to ensure that concrete cannot pass through, the roof can be concreted. The concrete should under no circumstances be wet and the mixture remains one part cement, two parts sand, one part ballast.
The roof structure described in
Chapter 5.2 can also be used for this type of
tank. But remember it requires a centre pier and the
double reinforcement of the centre of the tank floor. This
means the decision should be made before the construction work
starts. It is also possible to use the roof structure
of the tank described under 5.1 but this requires welded
reinforcement mesh or reinforcement rods as described in this chapter.