NAME
g.gui.rdigit - Interactive editing and digitizing of raster maps.KEYWORDS
general, GUI, raster, editing, digitizerSYNOPSIS
g.gui.rdigit
g.gui.rdigit --helpg.gui.rdigit [create=name] [base=name] [type=string] [edit=name] [--overwrite] [--help] [--verbose] [--quiet] [--ui]
Flags:
- --overwrite
- Allow output files to overwrite existing files
- --help
- Print usage summary
- --verbose
- Verbose module output
- --quiet
- Quiet module output
- --ui
- Force launching GUI dialog
Parameters:
- create=name
- Name of new raster map to create
- Name for output raster map
- base=name
- Name of base raster map
- type=string
- Type of raster map to be created
- Storage type for resultant raster map
- Options: CELL, FCELL, DCELL
- Default: CELL
- CELL: Integer
- FCELL: Single precision floating point
- DCELL: Double precision floating point
- edit=name
- Name of existing raster map to edit
- Name of input raster map
KEYWORDS
display, GUI, raster, editing, digitizerDESCRIPTION
Raster Digitizer is a simple tool to quickly draw lines, areas, and circles and save these features in a raster map. It is accessible from the Map Display toolbar (from the combo box on the right).Raster Digitizer currently allows you to:
- draw polygons, lines and points
- set category value of the feature you are drawing
- set feature width (width of currently digitized line or diameter of a digitized point in map units)
- create a new raster from scratch or from an already existing raster
- undo edits and save edits before leaving the digitizer
The typical workflow includes these steps:
- Set computational region as needed.
- Switch to Raster Digitizer and select a map to create. Select either a new raster or create a new raster from existing raster, also select raster type (CELL, FCELL, DCELL)
- Specify category value and width before drawing a feature
- Specify digitizing tool (area, line, point)
- Start digitizing and when you want to finish area or line, use right click
- Change color of temporary overlay depending on your needs
- Set different category and repeat
- At any point you can use Undo or Save
- If existing raster is used for the new raster, digitized areas will respect the color table, but you can always set different color table.
NOTES
Raster Digitizer respects computational region including the currently set resolution.EXAMPLES
In the following figures we start with elev_lid792_1m raster map in North carolina sample dataset and digitize two buildings, one rectangular and one with circular footprint. Both buildings have the roof level at 130 m. We set the width when digitizing the point to 50 meters which results in the building having 50 m in diameter. When we are done with digitizing, we save the result and explore cast shadows of the buildings with r.sun module:g.region raster=elev_lid792_1m # now create elev_edited raster by digitizing and save r.slope.aspect elevation=elev_edited slope=elev_slope aspect=elev_aspect r.sun elevation=elev_edited aspect=elev_aspect slope=elev_slope beam_rad=beam day=172 time=6
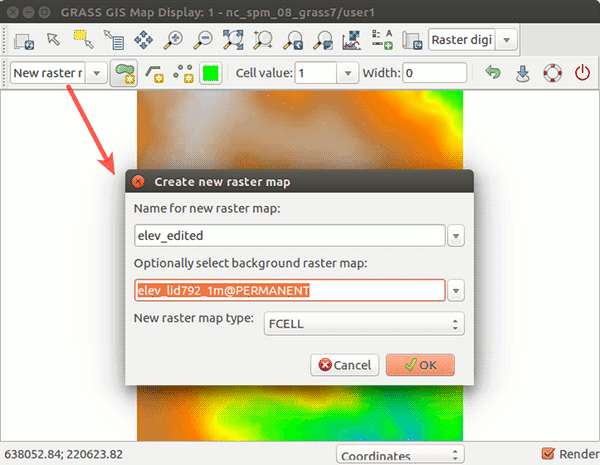
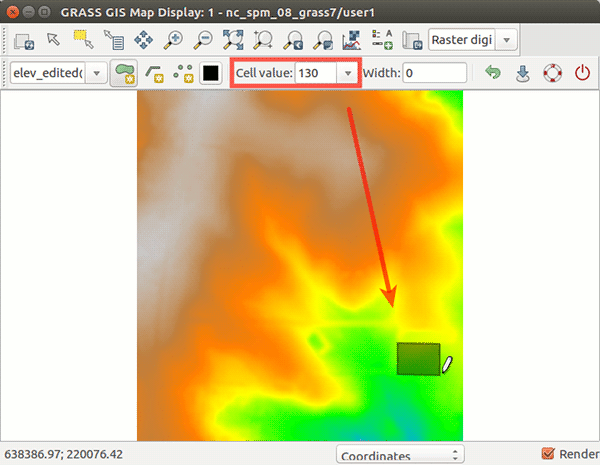
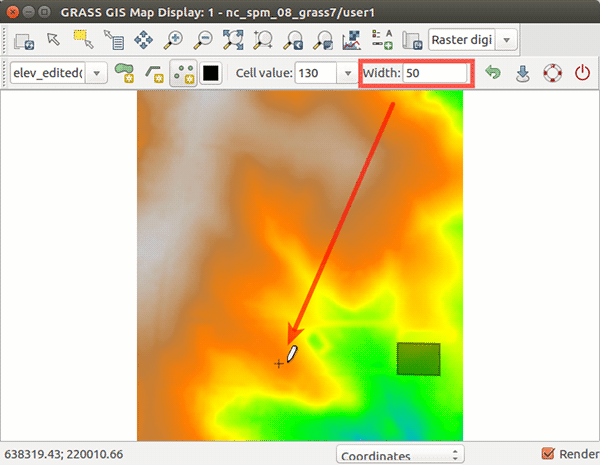
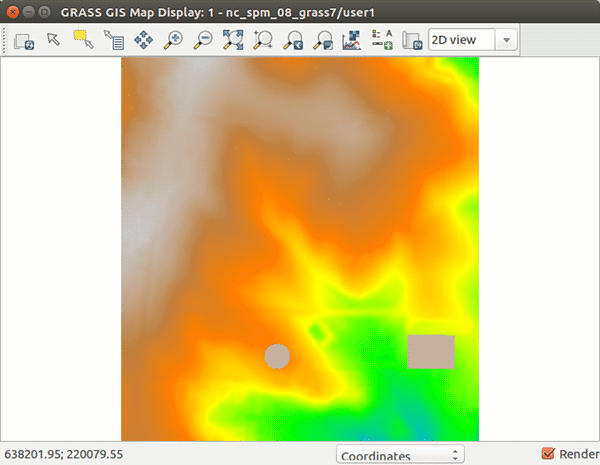
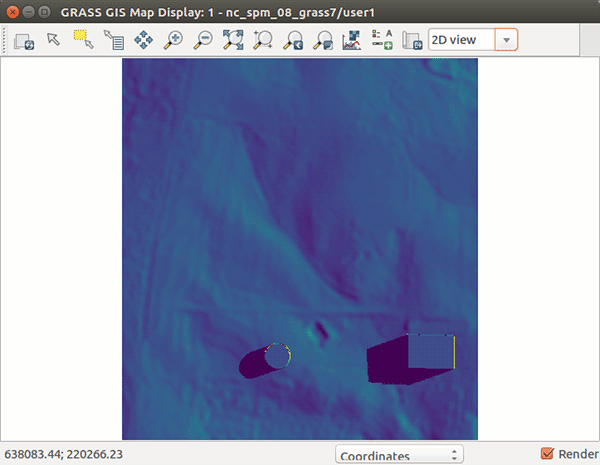
Figure: Steps to digitize new buildings on elev_lid792_1m raster map.
SEE ALSO
wxGUIwxGUI components,
r.in.poly (backend of digitizer),
g.gui.vdigit
AUTHORS
Anna Petrasova, NCSU GeoForALL LaboratoryTomas Zigo (standalone module)
SOURCE CODE
Available at: wxGUI Raster Digitizer source code (history)
Latest change: Saturday Jul 16 18:18:43 2022 in commit: 63e79c72f61149092b9546da4bc343cc581aa180
Main index | GUI index | Topics index | Keywords index | Graphical index | Full index
© 2003-2023 GRASS Development Team, GRASS GIS 8.2.2dev Reference Manual