


| Well Design |
A. Introduction
To design a well, it is necessary to decide what materials will be used
and how they will be put together. This includes determining:
the size and shape of the hole;
which digging and lining methods will be followed;
how much water needs to be available, and, therefore,
how deep the bottom section should go into the aquifer;
how the top section should be constructed to best protect the
well from contamination, while allowing easy access to water by
those who will use the well;
the anticipated well depth.
This chapter discusses the decisions that must
be made and presents options for consideration.
B. Well Shape
The shape of the well is what it would look like
if you were looking straight down into it.
C. Well Size
The size of the well is a measure of how wide it is. Some holes
are very large, and some are very small. The size
will be largely determined by: (1) the way it is
excavated, (2) the materials used to line it, and (3)
the purpose of the well.
The size of the round hole is usually expressed by its diameter, a
measurement from one edge of the hole through the midpoint
of the well to the other side of the circle.
(See Figs. 3-2 and 3-3.)
Although wells can
be dug in any shape, almost all wells are round.
The reason for this is that a round well produces
the greatest amount of water for the least amount of
work. Also, a round lining is the strongest that can
be built for the smallest quantity of materials. Thus, while
other well shapes have been used without problems, a round
shape enables the builder to get the most from available
time, money, and materials.
Square or rectangular wells
are usually dug where materials to be used in lining
the well necessitate such a shape. This is most often
the case when flat wood board" are the only lining
materials available. Wood, however, is not recommended for several reasons
which will be discussed later.
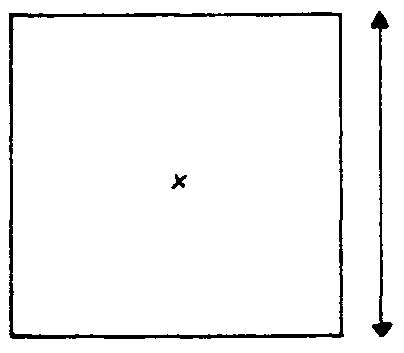
FIG. 3-1. SQUARE WELL
Well Size-Diameter
Before the actual digging work begins, the exact diameter of the hole must be decided (see Figs. 3-2 and 3-3).

FIG. 3-2. ROUND WELL
FIG. 3-3. DIAMETER IS THE LONGEST MEASUREMENT ACROSS THE HOLE
Many factors could determine which diameter should be used.
If there is a government-sponsored organization or agency which does wells construction using a standard diameter, you should consider using the same diameter. Doing so will make the eventual incorporation of the well into community and government planning and development much easier.
If forms or pre-cast lining sections are available, you might consider using them. It would necessitate choosing an appropriate diameter for the particular equipment you have. However, if the former situation (mentioned above) also exists, it should in most cases receive priority.
Generally, the choice of diameter will be based on two considerations. The well should have (a) the smallest diameter which still provides (b) a comfortable working space for the number of people that will be working in the well at one time.
a. The smaller the diameter of the well, the less soil and rock will have to be dug and the less materials will be required to line the well. Remember, if you double the diameter of the well, you increase the amount of soil and rock that must be dug by four times. For example, as indicated in the table below, a 1.0-meter diameter well 20 meters deep requires removal of 15.7 cubic meters (mł) of material while a 2.0meter diameter well 20 meters deep will require the removal of 62.8 mł.
Diameter x Diameter x 0.7854 = Area.
Area x Depth = Volume
| Diameter |
Area | Depth |
Volume |
|
1.0 m |
0.79 m˛ | 20 m | 15.7 mł |
| 1.1 | 0.95 | 20 |
19.0 |
1.2 | 1.13 | 22.6 | |
| 1.3 | 1.33 |
20 |
26.6 |
|
1.4 |
1.54 |
20 |
30.8 |
|
1.5 |
1.77 |
20 |
35.4 |
|
1.6 |
2.01 |
20 |
40.2 |
|
1.7 |
2.27 |
20 |
45.4 |
|
1.8 |
2.54 |
20 |
50.8 |
|
1.9 |
2.84 |
20 |
56.8 |
|
2.0 |
3.14 |
20 |
62.8 |
b. The workers will need enough space so that they are not hampered in their work. There must be enough space for them to use their tools and for the bucket which will remove excavated materials from the well. Without enough space, they will continually bump into each other and the wall. During stages of its construction, a well may have two or sometimes three different diameters (see Fig. 3-4).
(1) The hole is dug to the diameter decided upon.
(2) When a lining is installed, the diameter is further reduced along with the available working space.
(3) You may be installing the bottom section lining inside the existing lining. This will further reduce the diameter.
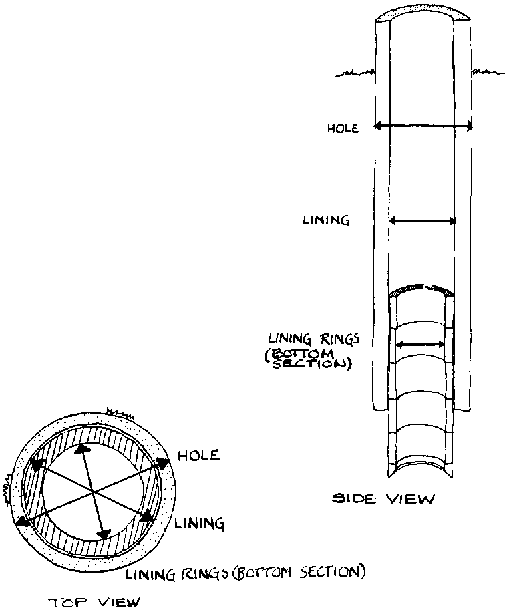
FIG. 3-4. THREE DIFFERENT WELL DIAMETERS USED DURING CONSTRUCTION
D. Ground Conditions and Lining
It is very difficult to anticipate what the final depth of a well will be before it is begun. However, if there are other wells in the area, it is possible to get an idea of the approximate depth of the water table. This can be a great help when gathering supplies needed for lining construction, because it will enable you to stockpile approximately enough materials to complete the well.
All wells, except those drilled through rock, can be expected to cave in with time unless a lining is installed to support the well. The lining thus helps to keep the well open. There are certain acts of nature, such as earthquakes or even gradual ground shifts, which will break even the strongest linings, but these cannot be planned for or anticipated. Occasionally slight ground shifts can put pressure on linings causing them to split and separate if not strongly built. Geologists can usually predict where such shifts are likely to occur. If no such information is available, it is recommended that you build the lining strongly enough to withstand normal earth stresses.
Depending on ground conditions, you may or may not be able to dig the complete hole and then line it. In very loose sandy soil, for example, the sand from the walls of the hole will frequently cave into the hole, seriously hampering efforts to deepen the hole. There are often relatively simple methods of dealing with such problems.
Designing the lining for the middle section is largely a matter of assessing the ground conditions and materials availability to determine the lining materials and method most appropriate for the situation.
1. Ground Conditions
Very loose soil (example: dry sand) - the hole is as wide as the hole is deep because its sides continually collapse and cave in (Fig. 3-5a).
Loose soil (example: damp sand) - a relatively shallow (1 to 5 meters) hole can be dug before its sides may cave in Fig. 3-5b.
Firm soil (example: compacted clay and sand mix) a hole can be dug to the water table with minimal danger of collapse and cave in Fig. 3-5c.
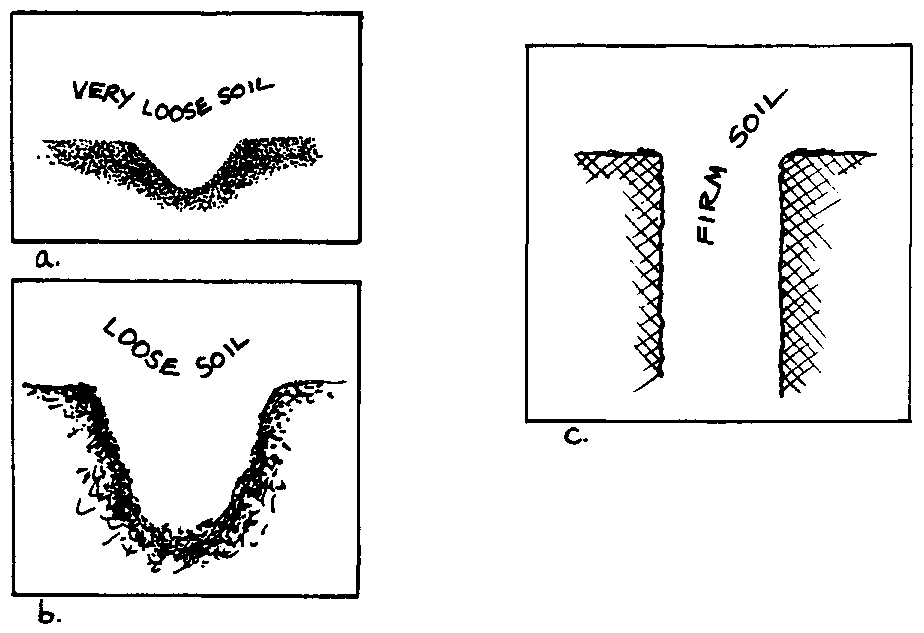
FIG. 3 -5. GROUND CONDITIONS
Unless you have had substantial experience digging in the area and this particular type of soil, or have been trained in the identification of soils and their properties do not leave the hole unlined for more than 5 meters.
The only possible advantage to digging the entire hole first is that you can then be certain that water can be reached before you start using your often expensive materials to line the well. However, if there is any question about the safety of working in an unlined section of the well, it is not worth the gamble to leave it unlined.
2. Dig and line options
Dig a short section and line
One source has suggested that for safety reasons, no more than 5 meters of a well should be dug and left unlined. More commonly, this cautious method is used in loose soil. This means of construction is also recommended in all soils when workers are inexperienced. Using this method, wells are dug in 0.5 to 5 meter sections, and then lined.
Dig to water table and line
This method is commonly used in firm soil, especially where the water table is not very deep. It has the previously mentioned advantage of not using any expensive materials in a well until a good supply of water can be assured. However, this method should not be attempted by workers inexperienced with well work.
Dig complete well and then line
This method is not recommended because of the danger of cave-ins beneath the water table which would undermine the entire well shaft. The only situation in which this method might be justified is where the middle section lining must rest on the bottom section lining for support, but there are many ways of avoiding that necessity.
E. Design: The Bottom Section
There are two basic methods for constructing the bottom section - sink lining and dig-and-line.
1. Sink lining into place. Advantages include:
The method protects workers from cave-ins during sinking;
Workers in the well can put all their effort into removing soil and water, presumably allowing greater well penetration into the aquifer.
A disadvantage is the possibility that workers may have difficulty in firmly attaching the rings together. (See lining rings, Fig. A.)
2. Dig and then line. Advantages include:
The method requires less special ,reparation;
The bottom section lining attaches directly to the lower part of the middle section lining, thus producing a stronger, continuous structure.
The disadvantages include:
Workers probably cannot get as far into the aquifer as in the other method because of the necessity for workers to remove soil and water and place reinforcing rod and concrete at the same time;
There is greater possibility of cave-ins because of a need to work beneath concrete that has not had time to completely set;
The method may require special fast-setting cement so as not to be washed away by water entering the well.
The purpose of the bottom section is to allow as much water as possible into the well without permitting any of the fine soil particles from the surrounding aquifer to enter the well.
There are three commonly used methods of allowing water to enter the well. (See Fig. 3-6.)
Through porous concrete lining - Lining rings sunk into the bottom section can be made of porous concrete which acts as a filter to prevent soil particles from entering the well.
Through angled holes in the lining - Holes can be punched in a freshly poured concrete ring which, when cured, can be sunk into the bottom section. These holes are more effective at preventing soil entry if they are slanted up toward the middle of the well.
Though the bottom The bottom of the well should always be constructed to allow water to come up through it. Often the bottom is simply left open and uncovered but it is preferable to prevent soil entry and the gradual filling up of the well.
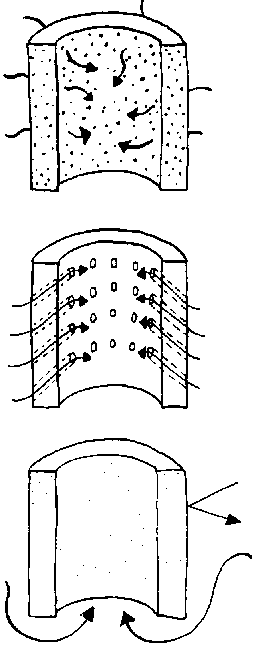
FIG. 3-6. WATER ENTRY INTO WELL
F. Design: Top Section
The purpose of the top section is to provide safe and easy access to well water and to prevent as much contaminated surface materials as possible from entering the well.
The design of the top section is strongly influenced by two aspects of well usage: (1) access to water or how water is drawn from the well, and (2) preventing, as much as possible, surface contaminants from entering the water. These two functions are not always compatible. It is often necessary to compromise sanitation for the sake of water access and community acceptance. Obviously you want to do this as little as possible but not to the point of jeopardizing support from the local community or government.
A top section, in fact, is not absolutely necessary for the function of a well. However, the different design of the parts of the top section is intended to make the well safer, cleaner, and more convenient for users.
Here are the major components of the top section:
Head wall;
Drainage apron (platform);
Cover;
Animal trough;
Wash basin.
1. Head wall
A head wall should be built on all wells which will not be fitted with a permanent cover and a pump as a simple inexpensive safety feature which will prevent people and animals from accidentally falling in.
This is simply a wall which extends above the surface of the ground far enough to prevent most accidental entry of people, particularly children, and animals. Its external dimension is dependent on how thick you want the head wall to be. A head wall that is unnecessarily thick will encourage people to stand on it to draw their water, creating an unsafe situation. The easiest and best way to construct the head wall is as an extension of the lining. In most cases it will be convenient to build the head wall as an extension of the lining above ground. You will already have the equipment and supplies on site with which to do this. The head wall should extend 80 to 100 cm above the ground surface or apron, if there is one (see Fig. 3-7).
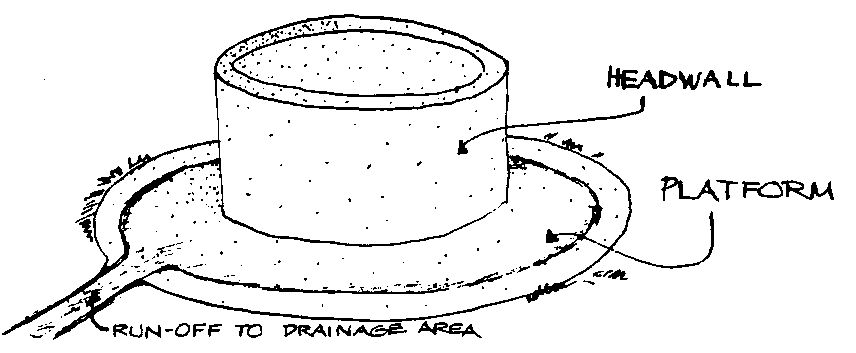
FIG. 3-7. TOP SECTION
2. Drainage apron (platform) (See Fig. A.)
A drainage apron is most often a reinforced concrete slab 1 to 2 meters wide which surrounds a well and, because of its slight slope, channels surface water away from the well. Wire mesh reinforcing may be used if it is available.
By forcing water to flow away from the well, the apron serves two functions:
It prevents contaminated surface water from following the outside of the lining and flowing back down into the well before it has had a chance to be sufficiently filtered by the earth.
It prevents the formation of a mucky area immediately around the well which can be a breeding ground for disease and a source of contaminants to the well water.
A sloping platform (Fig. 3-8) will simply move the mucky area from direct contact with the head wall to the edge of the platform. It will still be an eyesore and health hazard, although not so much as if it were right next to the well.
By installing a shallow channel (Fig. 3-9) or very short wall (Fig. 3-lO) around the edge of the platform, the water can be funnelled off to one specific area away from the well where people and animals will not have to track through it to get to the well.
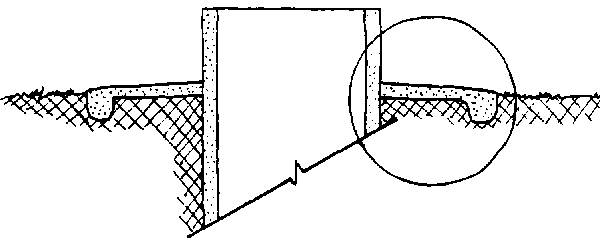
FIG. 3-8. SLOPING PLATFORM
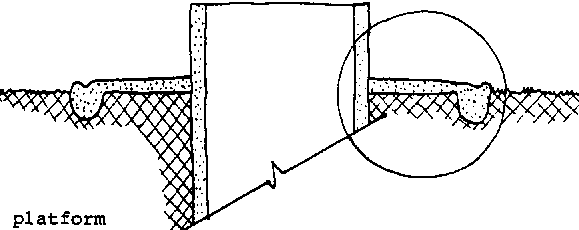
FIG. 3-9. SHALLOW CHANNEL
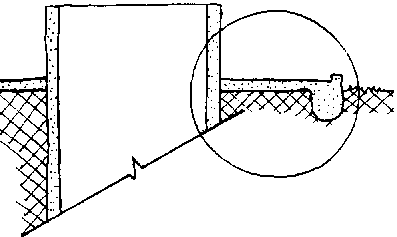
FIG. 3-10. SHORT WALL
The apron should be strongly and carefully constructed as it will receive a lot of wear, and any cracks or chips which develop will decrease the effectiveness of the apron.
An apron can be built of stone with mortared joints if cement is in short supply. If for some reason it is not feasible to build an apron, dirt should be built up around the well so that water spilled will tend to run off away from the well rather than collect around it.
3. Cover
A cover can improve the sanitary quality of the water in the well by preventing the dust and dirt normally carried in the air from entering and contaminating the water. It also prevents people from dropping things into the well.
There are two basic variation of well coverstemporary (removable) and permanent (fixed in place).
A temporary cover would be one that covers the well between the times it is being used, but must be removed to pull water from the well. For example, a temporary cover would be a wooden cover that rests on top of the well but must be removed to throw a bucket, tied to a rope, into the well. This is a limited step toward protecting the well water from surface contamination.
A permanent cover is usually made of reinforced concrete. It can be poured in place on the well or pre-cast in one or more pieces and later set over the well. (See Fig. 9-9.) Pump mounting bolts and an access door can be cast into the concrete. Pre-casting the cover in one or two pieces may be easier because of the difficulty of building a form which is both strong enough to support the weight of the concrete over the open well and which can then be removed after the concrete has set.
4. Drainage pit
In some areas it may be necessary to construct a special drainage pit to allow spilled and run-off water to soak into the ground. This may be used where other measures cannot feasibly prevent the build-up of standing water. If such a pit is deemed necessary, make sure that it is at least 10 meters from the well. The pit can simply be a hole dug in the ground which is then filled with loose rock and gravel.
NOTE: Where the water table is less than 3 meters from the surface, a drainage pit should not be dug because of the danger of directly contaminating the water supply.
5. Animal trough
If an animal trough is necessary, it should be built far enough from the well so that neither the animals nor their dung will collect around the well and thus contaminate the water.
6. Wash basin
It may be useful to build a wash basin if clothes washing is done at the well. It is important to prevent wash water from pouring back into the well and thus contaminating it. The basin should, therefore, be watertight and built at an elevation below the mouth of the well. Where there is no place to build a basin below the level of the well, it can be located 10 meters from the well.